Organize and upload your photos and videos in the Jumptools Media Gallery to use across all your tools, including your website builder and your print marketing. You are also now able to sync your Google and Dropbox accounts to access media there. If you are a Team admin, you will be able to share your files with your team members.

1. From your Jumptools dashboard visit the "Media" link on the top navigation bar.

2.1. The left side menu will show you where all your files are organized.

2.2. To Upload a new image, click on "Upload a file" or drag the image from your file browser onto the "drag and drop" area
Click on the "Upload a File" button to open your file browser. Select your image or video and upload from there.
You can also drag your image directly from your file browser into the drop area.
Image format must be in JPG and should not be more than 5mb in size.
Videos must be in MP4 and should not be more than 5mb.

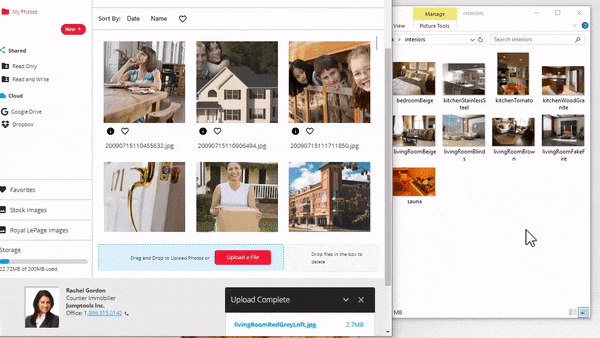
2.3. Sort images by Date, Name (alphabetical order) or by favourites.
Clicking the option a second time will reverse the sorting order

2.4. Click the information icon to view the file details

- This panel will open on the right side and will give you information on the image such as
- file name
- file type
- file size
- upload date
- dimensions - Description - describe what this image is about
Alt Text - add a short caption for this image
Tag - add tags to help you sort and search your images - Trash icon - delete this image by clicking this icon

2.5. To add this image to your "Favourites", click the heart icon

2.6. To delete an image, drag and drop in the "delete" area at the bottom

3.1. Your default tabs filters your "Favourites", "Stock Images", and "Stock Videos"

3.2. You can see how much storage you have used and have remaining.

3.3. Add a "New Album" and rename it

Click on the name on the top left hand corner of the main window to rename the album.
If you name this album the same as another existing album in your manager, you will be prompted to rename this album.

3.4. Drag and drop media from other folders into your new folder.

4.1. Share this folder with your team members

If "Read only" is selected team members can only view the images and description
If "Read and Write" is seclected team members will
- will be able to view the album
- will be able to upload photos into the album
- Edit tags on the assets
- Delete the assets
Team members are able to log into their own Media managers, and select the team website from the "Current Team" drop down menu (1). This will allow team members to see all the shared files and folders under the "Shared" section (2).

You can access your images from your Dropbox or Google Drive cloud services. To begin, you need to sign into your cloud service and authorize the link from Jumptools.
Once you are connected to Jumptools, you will see your image files in the Media browser. You can then drag these images to another folder to copy them there.